STIPA measurement

Each amplifier has a button to start a “STIPA” (Speech Transmission Index for Public Address Systems) measurement of the relevant audio zone.
The following window opens:
|
|
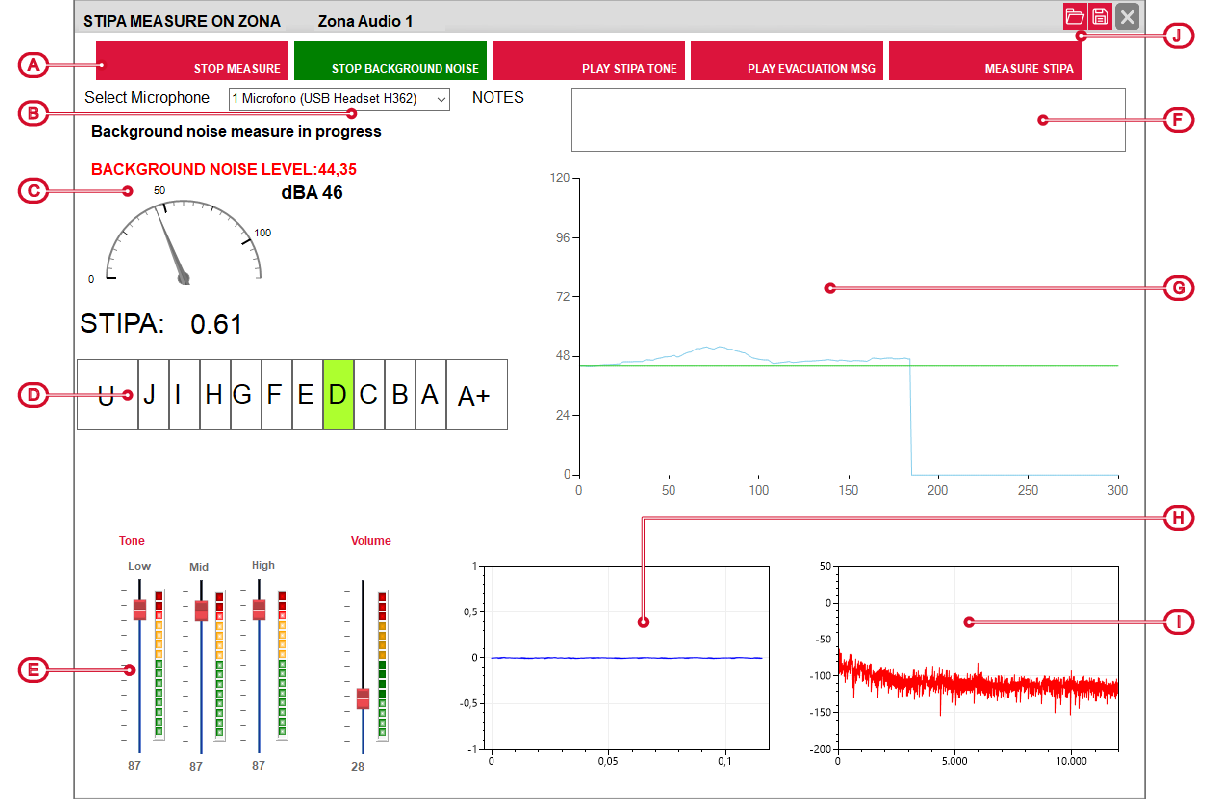
The window allows you to start a series of tests, using the buttons at the top [A]. By clicking on the button the test starts and the button changes colour from red to green.
Following is the appropriate procedure for carrying out a STIPA test:
-
Select the microphone [B]
Select one of the input channels of the sound board of the PC you are using for audio capture.
-
Starting capture
Press the “Start capture” button to start capture from the selected microphone.
The sound power indicator [C] and the real-time sound wave will be activated [G].
-
Starting background noise measurement
Press the “Measurement of the background noise” button to measure background noise. The captured audio signal will be displayed on the graph [H] and the sound pressure level in dBA will be shown on the indicator [[C]. At the end of the measurement time (15s) the average will be shown on the indicator [C].
-
Starting the evacuation message
Press the “Play evacuation MSG” button to adjust the volumes and equalization of the evacuation message selected for the zone via the selectors [E].
-
Starting the STIPA tone test
Press the “Play STIPA tone” button to adjust the volumes and equalization of the STIPA test tone via the selectors [E].
-
Starting the STIPA test measurement
Press the “STIPA measurement” button to start processing the STIPA test tone captured by the microphone.
During the test, the audio signal will be shown in amplitude on the diagram [H], the frequency spectrum on the diagram [I] and the sound pressure level on the indicator [C].
At the end of the processing phase, the STIPA numerical index and the quality class will be returned:
-
“0” very poor environmental quality, presence of strong reverberation or too high noise, class U
-
“1” perfect ambient quality without reverberations, class A+
If the result is uncertain due to disturbances, a question mark “?” will be displayed next to the numerical value and the test must be repeated.
-